Friday, December 14, 2007

Making flat panels

Flat panels are bulkheads, daggerboardcase, CMM's, bed-and sittie top and sides, cockpit-floor and bench, and a honeycomb plate I will use for various interior panels.


I start by preparing the foam. Cut it 10-20 mm to big (not accurate, but easier to glass over edge and then re-cut precise later. The marking is still there under the glass)
Then making holes. I use to do it with this fakir instrument on first picture, but pulling it out was to tiresome, so now I drill holes, but through both plates at one time ( st board and port side).

Cutting peelply


Cutting glass. Now using a proper pair of scissors (very expensive, but auto-cutting, mind controlled!!), much better than the cheap ones I used in beginning.


Wet out peel-ply with no wrinkles.

Wet out bottom glass.

Placing foam on top. The rest is the same; glass wet out, peel ply , wrinkles removed by gloved hands. Then comes release film and bleeder.
Note: I use the same vacuum bag several times, seen on the right, still attached to table at one side. It is more than 20 cm to big all around. When removing it it is like pulling off a bandage, do it quick.

Vacuum on.

Finished panel ready to cut. It can be cut with the peel ply left on.

Honey comp sheet.
It was to long for the table so I had to cut of a bit seen in front.

It is not possible to do both sides at ones, the combs would make an impression in top layer. I only make this, because this sheet was a leftover from a repair on the 18 footer cockpit.

After curing, cleaning the table with a 2 inch chisel, not to sharp and vacuum cleaner. Quite easy and no scratches.

Fairing float

Mixing the fairing compound on a laminate plywood. Easy to clean with a rag and some alcohol.


Fairing is done making thin ridges with a candybag, at 5-10 cm intervals, then sand them down to almost 0 mm ( lowspots shows easy this way). A hissing sound occur when sanding in fibers so then it is time to stop sanding and move on.


Next comes the difficult part. Filling the rest of the fiber. It is best done by first apply fairing with a smaller spartel, I prefer a 15-20 cm for this. I apply more than I need, and then fair/ scrape of the remains with a 35 cm. To fair I try to make strokes with a even pressure and I do it several times across float.
You need to fill between ridges several times as it is not possible to fill in one go.
I do it in two, but other use tree times to fill, It is very easy to use to much fairing. Of course it is easy to sand but it gets heavy too.

Here is first filling.

A few shots of different parts of the float.


Tuesday, December 11, 2007

Autum 2007 part 1

Back on the blog. So I been doing lots of boatstuff this autum. Installing a big table for vacuum bagging flat panel, Freddy was so nice to give me a leftover 38 mm chipboard covered with laminate.

And the SB float i faired ready for post curing, Hibuild and paint.

The bowcap is now glued in place and
shaped using powerplaner and long sanding board.

Vaccum the glass in place.

Before going any further some apples had to be picked. Our new tree from this season gave 10 apples, I was really surprised by this. The tree is just to the left of me.


And back to buisness, mixing fairing compound.


I use SP S'fair 600. Very easy to mix and spread easy.

TIP if cans are heated a little in a box or so it will get a lot softer and easier to mix

Tuesday, September 4, 2007

More skiff sailing

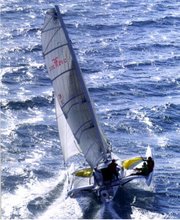
No work done for a long time but I did have a lot of fun racing and training in the 18 foot skiff. Here we sail under small rig in Sonderborg, DK with GP Covers middle crew Thomas Ebler in wonderfull 25 knots of wind, going 23 kn. max this day, since waves slowed us down a bit. Note Thomas is having a firm grip in my trapezebelt to prevent me from being slammed forward when hitting waves.


Here a shot of our new Ullmann sails under regatta in Sonderborg,DK.

Wednesday, June 6, 2007

Sailing 18 footer


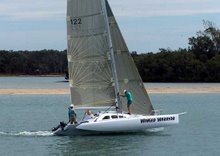
So why is nothing happening here, well I do other things like sailing the 18 footer seen here on Lago di Como, Italy, where these pictures are taken. And I go to Italy again this time Lago di Garda where the European Championship are held. We sail a tour called 18 footer Grand Prix
if you want to see more

Sunday, May 13, 2007

Foam bow and beamholes

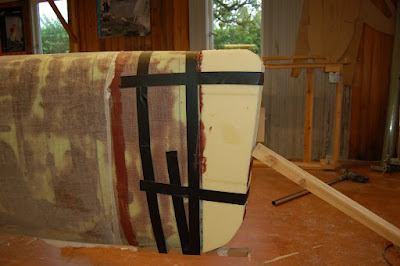
I almost used up this pile of scrap, so my waste is almost nil. That is the good thing about this foam, you can join it for details like these bow caps.


Before I fair the floats I need to add a sacrifice bow, or a bumber. I use scap pieces of foam and glue them together with polyurethane glue ( foaming glue ?). It makes the same material as the foam, very easy to plane with the power planer.

Here the bow is fitted and faired ( bog not sanded yet). I then need to glass it.

I also cut the round hatches open a made the holes for beams. Note they are offset a bit aft.

Wednesday, May 2, 2007

Laminating second float

Some readers of this blog have asked different questions regarding vacuum and laminate, so in this post I will try to cover these steps of the building.

Starting cutting the different layers. Here the peelply. Once cut, the pieces are put aside for later use. Preparing is rule when vacuumbagging. All materials should be ready once the epoxy work starts. I made this rolling rack to move the diffrent matrials around. From the top you see bleeder fabric, perforated film and 40 + 60 grit sandpaper, peelply, and bottom is glass.

Rolling the bleeder and put aside. What is going on besides this I do not know, Musse seems very exited about this, I look more skeptical.

Preparing the seal at hatch with tacky tape. Glass is ready for

Mixing epoxy by weight.

Musse roll epoxy on the fabric, I use a sqeegee to remove the surplus. It should be like a good hand layup when finish, only vacuum help clamping it together at elephant weight/m2 or something like that. There is no air left at all, all corner are tight, and more epoxy is absorbed by the bleeder fabric so a higher glass/epoxy ratio is achieved.

Peel ply extending past the laminate, which overlap the keel.
The Perforated film. Starring Martin F with friends.

The perforated film 2 . Starring Martin F in absentia.

I here show one sort of vacuum port I got. The two parts are twist-locked together with the bag between them. And the bleeder is put on .

I seal the bag around the hatch. I drilled a 3 mm hole in the shroud bulkhead so air can get into the aft end of the float. If this is not done the float will collapse. On the float is a batten with the vacuum hose attached. It got 4 outtakes. I do not use port for these ( I will maybe by some) I just seal them in the edge of the bag.

The bag is ready
The very smart vacuum coupling, sorry I only got one.
Musse connect the push in ( not up) hose.


The Blue lines are from the old Dupont ( see below) the transperant runs to Dupond.


Vacuum is being drawn.


My old pump, an Edwards from england. Cannot get along with the new so I had to seperate them by a wall, but there is no door so they can hear each other. Very handy if one of them falls asleep. What a story this is????


My new pump, an Edwards from england. Confused, welcome in the club, so I named them Dupont and Dupond. This one then being Dupond. This one got some kind of exhort filter seen on the top. Very happy with the floor marking though.


Unwrapping the cured float. Bag can be seen at the end. Bleeder on the floor.

A look at the laminate close up. It almost look dry but it is loaded with strong juice. Very course fabric I got from my supplier, a roving this is. This is super.

Again a look at the final laminate with additional reinforcement, seen as more green in the middle. This is an extra layer on each side of the float.
Good night everybody.